Git for Beginners: Basics and Essential Commands
Aspiring Full-Stack Developer
In my first year of college, my friends and I signed up for our very first hackathon. We were excited, full of ideas, and ready to build something great. But we ran into a massive problem almost immediately: How do we actually work together?
I was writing the main logic, one friend was working on the frontend, and another was handling the database. We tried sending code snippets over WhatsApp and emailing files back and forth. By hour twelve, nobody knew which version of the code was the "latest" one. We accidentally deleted each other's work and spent more time fixing bugs than building features.
That was the moment I realized: If you want to build anything with a team, you need Git.
1. What is Git and Why Do You Need It?
Git is a version control system that allows you to track changes to your files and collaborate with others. It is used to manage the history of your code and to merge changes from different branches.
Git and Github are different
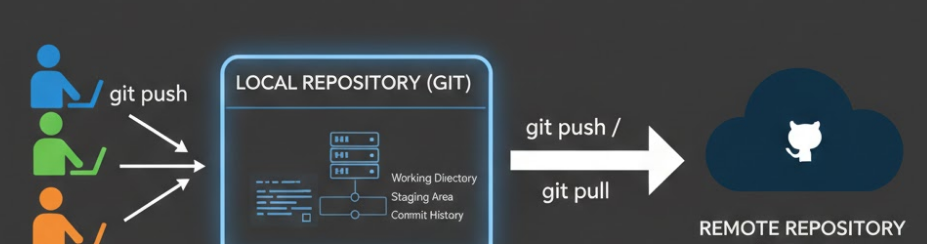
Git is a version control system that is used to track changes to your files. It is a free and open-source software that is available for Windows, macOS, and Linux. Remember, GIT is a software and can be installed on your computer.
Github is a web-based hosting service for Git repositories. Github is an online platform that allows you to store and share your code with others. It is a popular platform for developers to collaborate on projects and to share code. It is not that Github is the only provider of Git repositories, but it is one of the most popular ones.
2. Core Concepts
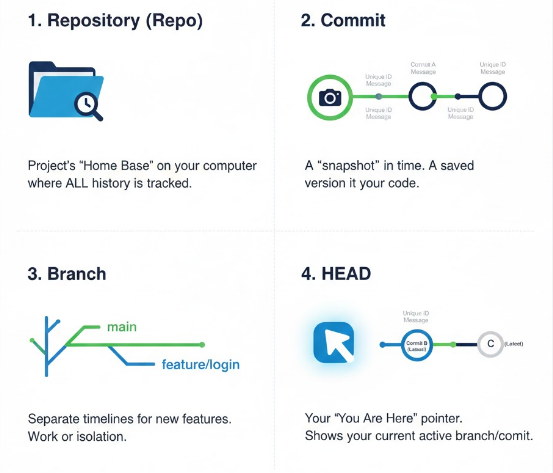
To avoid the chaos we had at our hackathon, you need to understand these four terms:
Repository (Repo): This is your project's "Home Base." It’s the folder where Git tracks everything.
Commit: A "snapshot" of your code. When you finish a feature, you "commit" it to save that progress forever.
Branch: A separate timeline. You can work on the "login-page" branch without breaking the "main" code that your friends are using.
HEAD: A pointer that says, "You are currently looking at this specific version of the code."
3. The "Hackathon" Essential Commands
When you’re in the middle of a 48-hour sprint, you don't have time to learn 100 commands. These are the five that will keep your team from losing work.
1.
git initThis is the starting gun. You run this once inside your project folder to tell Git: "Start watching everything that happens in here."
The very first minute of the hackathon.
If you see a hidden folder named
.gitappear, you’ve done it right!
2. git status
Think of this as your GPS. It tells you exactly where you are and what you’ve changed since your last save.
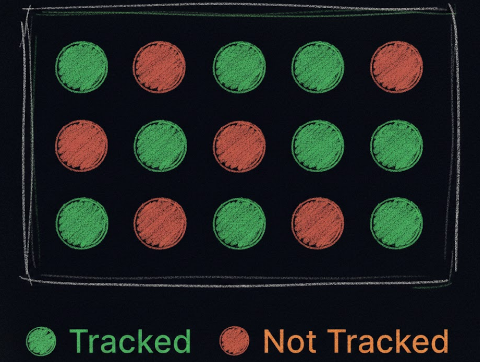
Red files: Changes you’ve made but haven't told Git to remember yet.
Green files: Changes that are packed and ready to be saved.
When to use it: Use this constantly. Before you add, after you add, and before you commit.
4. git add .
The . means "everything." This command moves your changes into the Staging Area.
- Imagine you are taking a photo of your friends.
git addis like asking everyone to stand in the frame and get ready. They aren't in the photo yet, but they are prepared.
5. git commit -m "your message"
This is the "Capture" button. It takes the snapshot and saves it permanently into the project's history.
The
-mflag: This stands for "message." You must explain what you did.Example:
git commit -m "Finished the user login logic"
6. git log
This is your Time Machine. It shows a list of every commit ever made, who made it, and when.
- When to use it: When you realize the code was working two hours ago but is broken now. You use
git logto find the exact "save point" you want to go back to.
4. Your First Workflow: From Scratch

Before you run your first command, imagine your project divided into three zones:
Working Directory: Your local folder where you are actively typing code.
Staging Area: The "loading dock." You put files here to tell Git, "I want these included in my next save."
Local Repository: This is where your history is permanently stored.
Step 1: Initialize the Project
Open your terminal inside your project folder and run:
git init
Git creates a hidden .git folder. it will store every change you ever make from this moment forward.
Step 2: Create and Modify
You start coding. For example, you create a new file:
touch app.js
Now, run git status. You will see app.js in red. This means it is "Untracked" Git sees it, but it isn't watching it yet.
Step 3: Staging
You decide your code is ready for a snapshot. You move it to the staging area:
git add app.js
Run git status again. The file is now green. It is sitting on the "loading dock," waiting for you to hit the save button.
Step 4: Committing
Now, you permanently save that version of the project to your local vault:
git commit -m "Initial commit: Set up basic app structure"
You now have a "save point." If you delete your code tomorrow, you can come back to this exact moment using this commit.